CCB Exporting
Posted By: on August 1, 2014
For those that are currently using Church Community Builder, this is step by step process to integrate your Church Community Builder with your Continue to Give donation exports. There are three main steps.
- Add your existing CCB donor IDs to your Continue to Give reporting tools.
- Export your Continue to Give report.
- Import your Continue to Give report into your CCB. Let's get started!
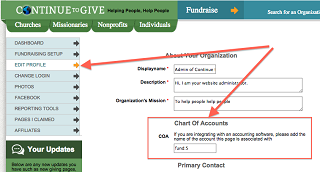
Before we get started lets update your chart of accounts:
Your chart of accounts in Continue to Give needs to match your Chart of Accounts in your Church Community Builder. This will allow you to to keep your financial records straight.
In Continue to Give you have one chart of account name for:
a) Your main Continue to Give account
b) Each project you create
You need to update each separately. Let's get started:
1. First let's update your chart of accounts for your main account by going to your "Edit Profile" tab in your dashboard. Here you can add your chart of accounts.
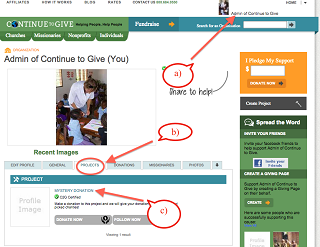
2. Now lets update your chart of accounts for each project you have. If you don't have any projects you can skip this step.
- Go to your profile page by clicking on your name in the upper right side of your screen
- Click on your projects tab
- Click on the project
3. Once you have clicked on your project, go to the "Edit Profile" tab and fill in your Chart of Account name for this project.
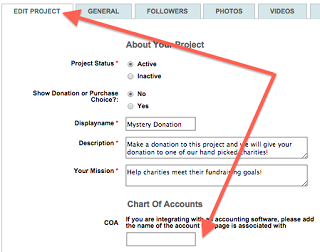
4. Continue to do steps 2 and 3 until you have made a Chart of Account for each project.
Now that you have all your accounts from your Church Community Builder in your Continue to Give account, we can now proceed.
-
Add your existing CCB donor IDs to your Continue to Give reporting tools.
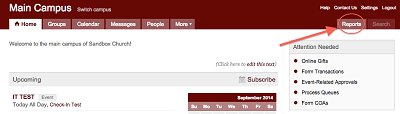
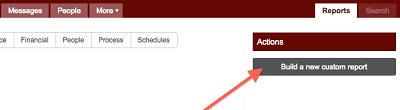
- Log into your Church Community Builder and Click on the "Reports" tab in the upper right have of your screen.
- Click on the "Build a new custom report"
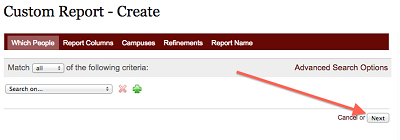
- Click "Next"
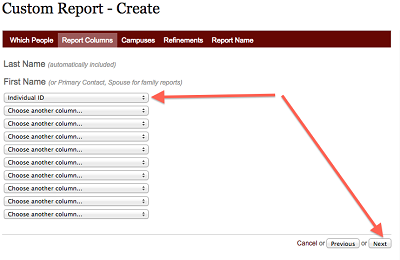
- Add one field called "Individual ID" then click "Next"
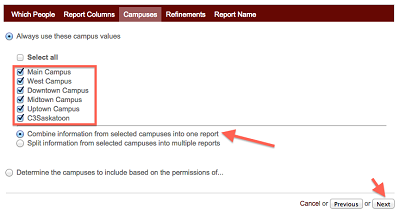
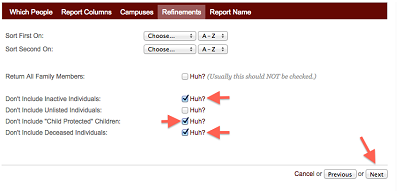
- Make sure all of your campuses are selected and also select "Combine information..." as seen below. Then click "Next"
- Check the indicated boxes below then click "Next"
- Name your report and write a description. Then click "Save and Run this Report"

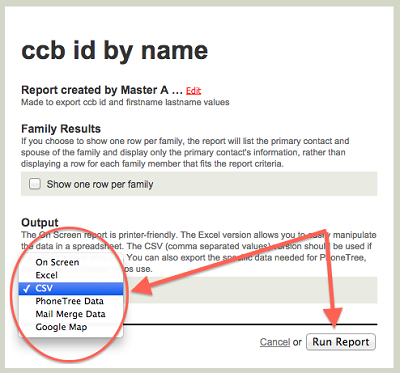
- Click the Output drop down bar and choose "CSV" then click "Run Report." Save this report to your desktop where you can easily find it.
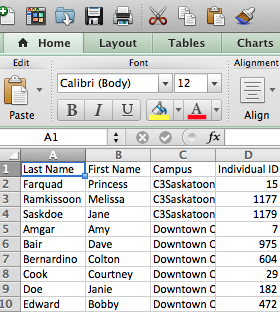
- Open that CSV file you just saved to your desktop. It should look like the picture below and in the order "Last Name, First Name, Campus, Individual ID"
- We need to rearrange this excel sheet so that it is in the order of "Individual ID, First Name, Last Name"
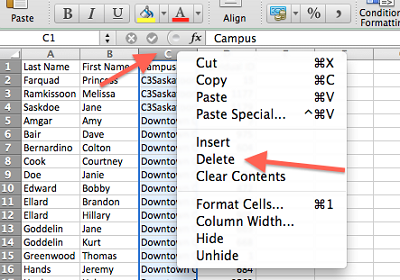
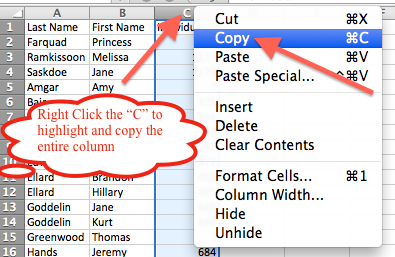
- First highlight the column "Campus" and delete it by right clicking on the "C" column and clicking Delete from the menu.
- Next rearrange the existing data by copy and inserting until you have the data arranged by "Individual ID, First Name, Last Name"
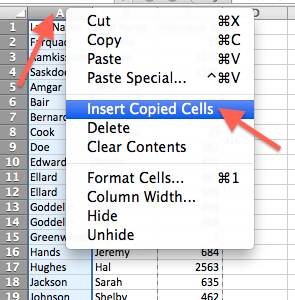
- To copy and insert columns: First right click on the top of the column you want to copy and click copy from the menu. Then Right click on the top of the column where you want your data to be inserted and click "Insert Copied Cells." Once you have copied your cells to where you want them delete the old column that you originally copied.
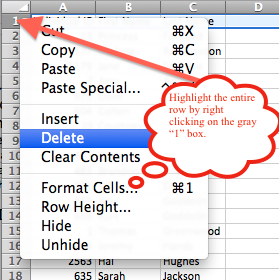
- Now that your columns are in the order "Individual ID, First Name, Last Name" now delete the top row column headers by right clicking on the "1" gray box and choosing "Delete" from the menu.
- Now that your data is in the order of ID, First, Last name with no headers, you can save this file back to your desktop.
- We need to rearrange this excel sheet so that it is in the order of "Individual ID, First Name, Last Name"
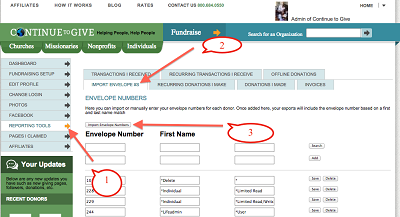
- Log into your Continue to Give profile (Make sure you are logged in as your Organization). First find your reporting tools. Second, click on your "Import Envelope #s" tab. Third, click "Import Envelope Numbers"
- Choose the file you saved to your desktop and click upload.
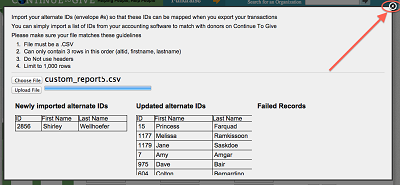
- Once the upload has completed you should see a report like the picture below where you have Updated alternate IDs, Newly imported alternate IDs, Failed Records. Then close out of this by clicking the little "x" button in the right corner.
- Log into your Church Community Builder and Click on the "Reports" tab in the upper right have of your screen.
-
Export Your Continue to Give report:
Now all of your CCB ID's have been matched by first and last name to your Continue to Give donations. Now lets export your Continue to Give donations report so we can upload it into your CCB to update your congregations giving.
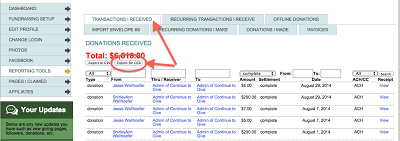
In your reporting tools, go to your "Transactions I Recieved" tab and click on the "Export for CCB" and a box will pop up and click "Yes, Export for CCB." Save this file to your desktop as "CCB" or something that will not confuse you with the last file you saved to your desktop.
-
Importing Your Continue to Give Report into your CCB
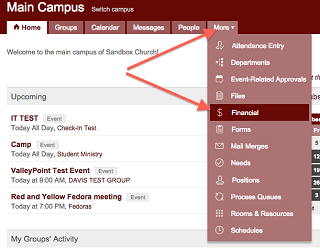
- Go back to your Church Community Builder account home page. Click the "More" tab and then click "Financials"
- Click on the Imports tab and click "Change settings"
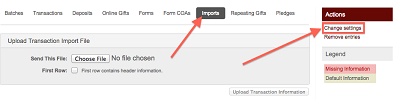
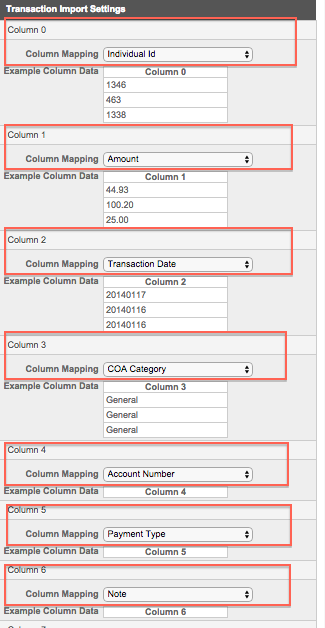
- Match all 6 column settings as seen below in this screen shot (7-12 will be marked "Not Used"): Scroll to the bottom of the screen and click "I'm Finished"
- Now that your settings have been created, choose the CCB file on your desktop that you downloaded from your Continue to Give reporting tools. Check the "First Row" box. Then click "Upload Transaction Information." Your donations are now imported to your CCB!

- Scroll to the bottom of the page and click "Create Transactions"

- Go back to your Church Community Builder account home page. Click the "More" tab and then click "Financials"
Congratulations! Your CCB is now updated with your donations from Continue to Give!
Get Paid To Blog
We are looking for great bloggers
Are you working in ministry? Do you like to blog? We'd love to share what you have with those who need it most. If you are looking to write blogs that will help Churches, Missionaries, and Non-Profits, please contact us to have your blog paid for and featured!
Contact UsContinue To Give is a powerful all in one software you will love!
Check Out Our Free Demo
Some More Happy Clients